Easy Home Maintenance Tips Every Widow Needs to Know
Short and Sweet Summary: If you’re sinking under the weight of your new maintenance responsibilities, here are a few ideas for you to complete that are easy enough to do on your own. Rest assured that these home maintenance tips every widow needs to know are super simple items you can start monitoring on a monthly basis. You are WAY more capable than you think you are. You can do this.
Most of you probably never realized how many home maintenance tasks your spouses took care of until after they were gone. A lot goes into maintaining a home and now that it’s up to you to do everything by yourself, those tasks are coming to light.
And they keep piling up.
I got a head start on learning about all the things I didn’t know because my husband was diagnosed with a terminal illness. He knew he was going to die. So he made a list of things he wanted me to know how to do after he was gone.
Can you even imagine? “Here honey, here’s a list of things you’ll need to know how to do after I die.” I mean, it’s crazy, right?
But I’m not joking when I say he made a list of things he felt were important enough to show me how to do. The first thing was learning how to clean out my clogged shower drain.
UGH. It’s so gross.
I cried my way through most of these tasks in the first few years of widowhood. I would’ve been totally A-OK without ever knowing how to unclog a shower drain. Seriously.
But the tasks fell onto my shoulders anyway and I’ve been doing it so long now that I don’t even give these jobs a second thought. I compiled a list of some super simple home maintenance tips every widow needs to know because these are things you can do by yourself, too.
You don’t need to hire these tasks out. And you don’t need any tools (well, maybe a screwdriver. No biggie). You just need a few minutes once a month to knock out these easy peasy tasks and keep your house humming right along.
CHANGE YOUR FURNACE FILTER
Changing your furnace filter regularly is the easiest way to maximize your furnace efficiency. It also helps purify the air inside your house by trapping dust and dirt.
A good rule of thumb is to change the filter every three months. However, consider changing your filter monthly if any of the following apply:
- you smoke
- have pets
- keep your windows open
I recommend taking a picture of your air filter measurements and keeping it on your phone so you know what size air filter to buy when you’re out and about.
For example, my filter is a 16x25x1. I use the Filtrete Healthy Living 2200 brand. And I keep a picture on my phone because, yes, I forget the size. Often!

Another helpful recommendation is to mark the air flow on your furnace in a conspicuous place so you’ll always know which way the filter arrow (air flow) is inserted.

The arrow on the filter should go in the same direction as your air flow.

So you take the old filter out and replace it with the new filter. Simple, right? Make sure to push the filter in all the way and voila! Cleaner air inside your home for another month or two!
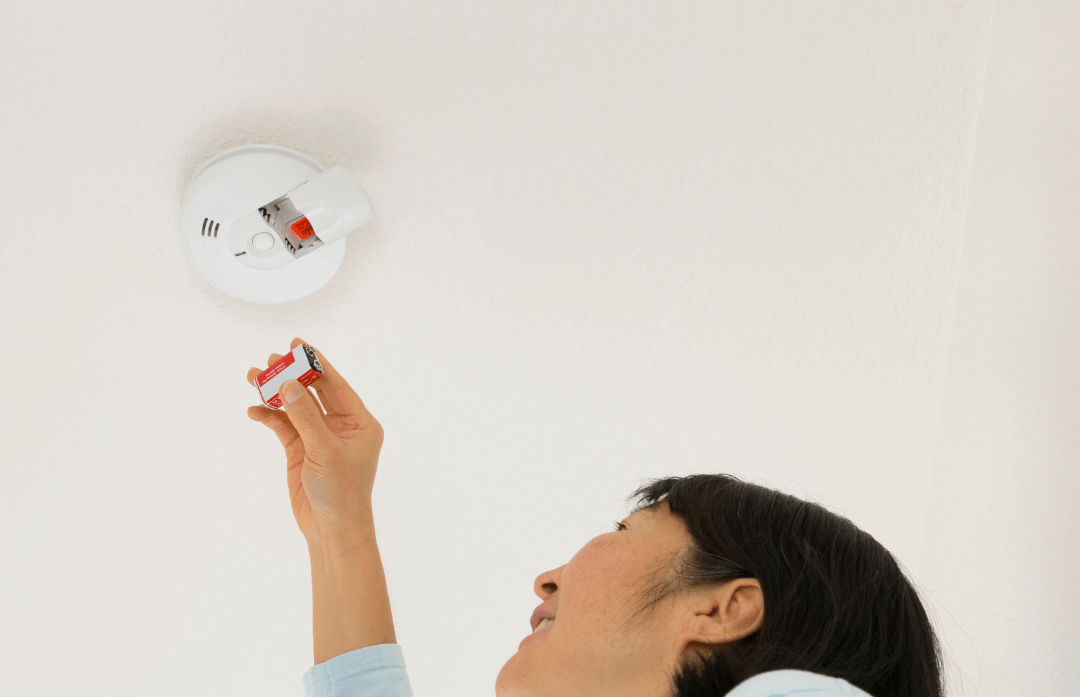
TEST YOUR SMOKE ALARM BATTERY
You should test your smoke alarms on a monthly basis and change the batteries at least once a year. The US Fire Administration recommends replacing your smoke alarms after ten years.
In order to test the alarm, you’ll need a step stool, unless you’re 8 feet tall. It’s not a bad idea to grab a flashlight too because sometimes the buttons and battery terminals are hard to see or read.

Test all of your smoke alarms by pressing the “test” button to confirm the alarm emits a siren sound. If the sound is weak or non-existent it’s time to change the batteries.
If you need to change the battery, make sure you have a 9-volt battery handy.

Open the cover by twisting it counter-clockwise.
Notice which way the battery is inserted so you can line the positive and negative connectors up correctly.
I mess this one up often, too. I’m telling you this to save you time and frustration from trying to figure it out after the batter is removed!

Remove the old battery and replace it with the new 9-volt battery .
Confirm the positive (circle) and negative (octagonal) connectors match up with the new 9-volt battery connectors.
Place the smoke detector cover back on and twist clockwise to close.
These instructions will come in handy when you hear those pesky smoke detector “chirps” at 2:00 AM because the battery is weak and it’s signaling you to change it. My smoke detector never chirps for a battery change at 1:00 in the afternoon when I’m wide awake and alert and ready to take on the day’s challenges.
Oh no…no…no….no. The incessant chirps from the smoke detector arrive at god-awful times during the night when I’m in a deep slumber. Grrrrr.
You too?
You HAVE to get up and change the battery or you’ll never get back to sleep!
CLEAN THE GARBAGE DISPOSAL
Did you know you needed to clean your garbage disposal on a regular basis?
I never did until I came across an ingenious way to use old lemon peels.
Before I get to the ingenious idea, you need to know that you can lengthen the life of your disposal by keeping it properly maintained. Who knew?
The easiest way to keep it maintained is to run a handful of ice cubes through the disposal on a monthly basis to sharpen the blades and clean the inside. The crushed ice acts as a sort-of cleaner in hard-to-reach areas.
Now, here’s where it gets interesting. You can cut up an old lemon peel and freeze the pieces with water in an ice cube tray (this one is my favorite). When you do your monthly garbage disposal maintenance, grab the lemon ice cubes and not only will they sharpen your blades, they’ll ALSO Keep the garbage disposal smelling fresh!
You could use lemons, limes, or any other citrus peels or even vinegar. The acid in the citrus peels or vinegar also helps to clean the blades.
Win-win!
CLEAN YOUR MICROWAVE GREASE FILTER
I’m embarrassed to admit I also didn’t know I needed to clean my microwave grease filter. To be honest, I never even knew there was a filter underneath my microwave.
Lordy that thing was disgusting. It was so bad, the filter actually broke when I removed it and I had to order a new one.
I thought about just ordering a new filter every few months and skipping the cleaning part altogether, because, well, who wants to clean?! But then I came to my senses and started cleaning the damn thing without spending any more of my hard-earned money.
Now it’s on my monthly rotation cleaning list.
Here’s a super handy YouTube video with the simple steps it takes to clean your microwave grease filter:
The video instructs you to clean the filter in your dishwasher. However, if you don’t have a dishwasher or you’d rather not use it to clean your filter, you can also add 1/2 cup baking soda to a pot of boiling water (slowly) and soak your dirty filter for about 30 minutes. Rinse it clean with hot water after soaking and let it dry before you put it back.
SEARCH FOR LEAKS AROUND TOILETS AND SINKS
I didn’t realize my bathroom toilet was leaking water until it started to smell. I couldn’t figure out why the bathroom smelled like urine when I cleaned the toilet regularly.
It turns out there was a small water leak on the water shutoff valve behind the toilet where I couldn’t really see it. But water was seeping into the floor boards and causing all kinds of stink.
Once I got the leak fixed, the smell when away.
Now I make a habit of checking around the toilets and under the sinks monthly to make there’s no water where it’s not supposed to be. Small leaks can usually be fixed inexpensively. But if left untreated, could turn into a major plumbing job costing hundreds of dollars.
So, take a few minutes once a month to look behind and under places you don’t normally look in the bathroom and kitchen and save yourself the headache of dealing with something that could have been prevented.
WIDOW WRAP UP
So how do you feel now that you know you can do these jobs to prolong your appliances and keep your house running smoothly?
Like a bad-ass, getting-shit-done, warrior widow?!
You should!
These super simple home maintenance tips every widow needs to know are things you can do by yourself. They are quick monthly maintenance jobs that only take a few minutes, but extend the life of your hard-working home appliances.
When you’re feeling down or like you don’t know how to do anything and life is awful because you’re alone and no one is there to support you or help you…run some ice cubes down your garbage disposal. Or check for leaks in your bathroom or kitchen. It will take your mind off the things you tell yourself you don’t know how to do.
Because now you know how to do these five things.
So pat yourself on the back for taking care of business.
Related Posts
- How to Unclog the Shower Drain
- The Sophisticated Widow’s Guide to Using Smart Home Gadgets
- How to Create a Home Inventory and Settle Insurance Claims Faster
Wow!what a great BIG help!!
I did’nt know these things either. Did you run a bead of silicon plastc caulking around the outside of the toilet rim where that rests on the floor? It helps keep mens pee from getying under that rim. Before my husband of 20 yrs past, he’d miss so much of the time poor guy. So I cleaned as good under that rim at the floor & learned to do the caulking!
Lets keep supporting one another with these posts.
God bless you!
DIANA P.
Hi Diana, good to know about the caulk!